How to add a password to files and folders on macOS
If you’ve ever tried to protect your sensitive files with a password you’ve probably noticed that macOS does not have a way to put files behind a password directly in Finder. The best workaround for this is to use Disk Utility to create a password-protected disk image, which will work like a folder or a digital hard drive where you keep all your sensitive files.
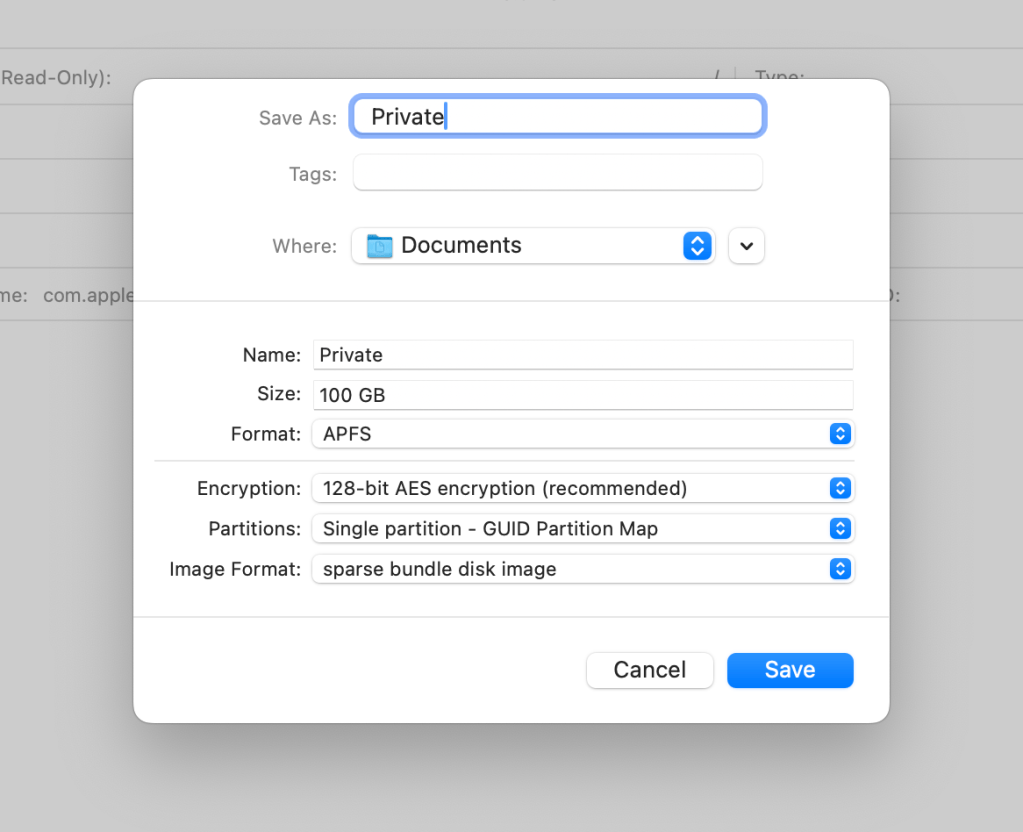
Creating a password-protected disk image
- Open Disk Utility
- Go to File – New Image – Blank Image
- Give your Disk image a name
- Under the Encryption setting, choose either 128-bit AES encryption or 256-bit AES-encryption. 256 is more secure but slower, so in most cases 128-bit is sufficient.
- Type in the password you want to use. The longer the password, the more secure it is.
- Choose your image format – you can create a standard disk image with a fixed file size, or you can create a sparse bundle. Using a sparse bundle allows you to set a maximum file size for your disk image, but the actual size it takes up on your computer will only be as much as the total size of the files you’re storing inside.
- After choosing the image format, go back a few steps and set the maximum file size for your image. Changing the format resets this, so it’s better to choose your image format first and then pick your file size.
- Lastly, check your format. APFS or Mac OS Extended are both good options for Mac, but if you need Windows compatibility you can use ExFAT
Once your disk image is created, you can open it and you’ll be prompted for a password. Type in your password, and your disk image will show up similar to an external hard drive on the left side of your Finder window.
Now you can copy all your sensitive files and folders inside your disk image. Think of it as a digital hard drive. When it’s connected, you can see the files. When it’s not connected, the files are not accessible to anyone. Once done copying, you can delete the files from their original location if you want to make sure no one without a password can access them. Then simply unmount your disk image, and all that’s visible is the disk image. None of its contents are visible or accessible to anyone, unless they have the password to open up your disk image.
For more quick tutorials like this visit http://youtube.com/@quick-tutorials

Leave a comment